Making a name for yourself as a photographer is hard enough without having to deal with all the minutia of setting up a self-hosted website. Often, the thought of purchasing hosting, developing the design, and creating your content feels like extra hassle you simply don’t need.
That’s where Squarespace comes in. It’s an easy-to-use platform with some simple options for customization – and it can enable you to get started selling your prints online in a matter of hours.
In this article, we’ll cover three key steps to get your photography store up and running using Squarespace. Furthermore, we’ll introduce you to a robust alternative in Visual Society, in case Squarespace doesn’t offer all of the features you need.
The Pros and Cons of Selling Photos on Squarespace
Squarespace enables you to create beautiful websites and online stores with little fuss. It’s a modern platform with aesthetics to match, and it offers a decent set of features, including:
- An ample collection of stylish templates.
- No need for third-party hosting.
- The ability to sell both prints and digital photographs.
Those features are decent. However, while Squarespace does enable you to set up an online store with ease, there are number of downsides for those looking to sell their work:
- Squarespace isn’t designed with selling your photos in mind.
- You can’t specify multiple sizes for your prints.
- Photographs can’t be added in bulk, which makes it a tedious process for large collections.
- There’s a lack of customization options available for artwork and photography.
Given the drawbacks of using Squarespace to sell your work, it could end up increasing the time you spend working on your website compared to other platforms built specifically for selling photos and prints online, such as Visual Society. However, if you’re happy to work around these limitations, Squarespace does remain a solid option for selling your photographs online.
How to Sell Photos on Squarespace (In 3 Steps)
Now we’ve weighed up the pros and cons of using Squarespace to launch our photography empire, it’s time to learn how to do it. Let’s take a look at the three steps you’ll need to get cracking.
Step #1: Pick a template
For the purposes of this guide, we’ll assume that you already have a Squarespace account set up. If not, you can always sign up for a free 14-day trial with no strings attached.
When you log in for the first time, you’ll be asked to choose a template for your site. Think about Squarespace templates as starting points for your website’s design. There are an extensive collection of modern designs to build upon – all you have to do is pick the right one for you.
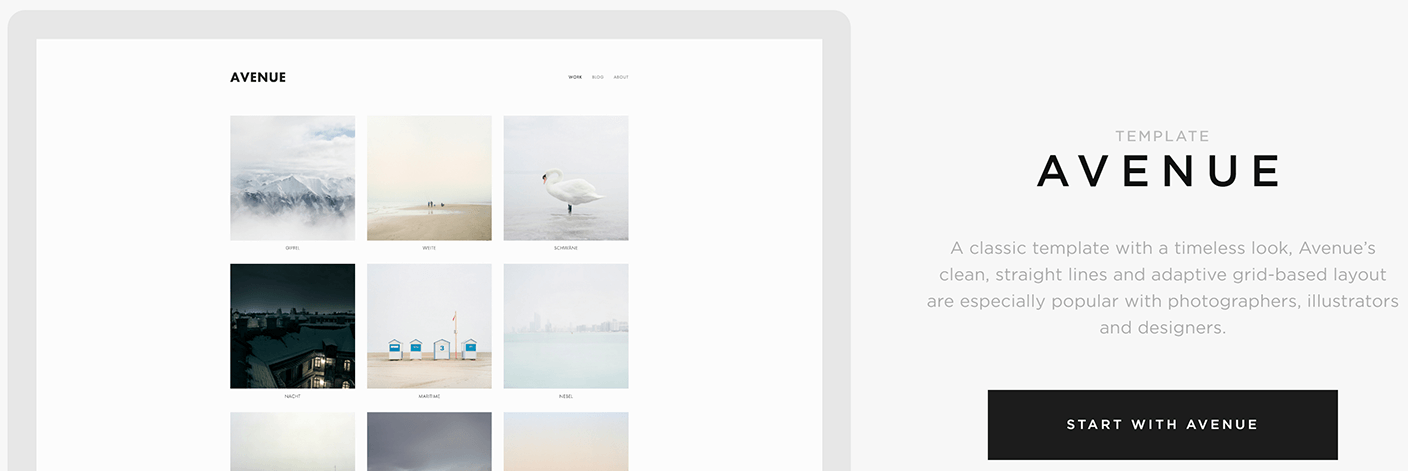
Since you’ll want to use your website to sell photos, let’s choose a template from the Photography category – Avenue:
After clicking on Start with Avenue, the platform will open your new dashboard, which means you’re ready for step number two. Remember, if you’re not a fan of Avenue, you can always choose a different theme – but of course, picking one that’s related to photography will offer a path of least resistance down the line.
Step #2: Configure Your Payment Options
Next up is configuring your payment and checkout settings. For the latter, click on Settings > Payments in our Squarespace dashboard. The payments tab enables you to connect Stripe and PayPal accounts to your store, and choose the default currency:
Clicking on either option will prompt you to connect your accounts to the platform, which in turn will enable the respective options for your customers. Choose one (or both) of them depending on your preferences, then change your store’s primary currency if necessary.
Step #3: Add Your Photographs
Now the exciting part – adding your photographs! For this, return to the dashboard and click on Commerce > Inventory. This screen should be bare, but it will populate once you begin adding photos – which you can do by clicking Add Product:
Next, you’ll need to choose an appropriate product page. If you’re using Avenue or another photography based theme, you should see a Photographs page among the options:
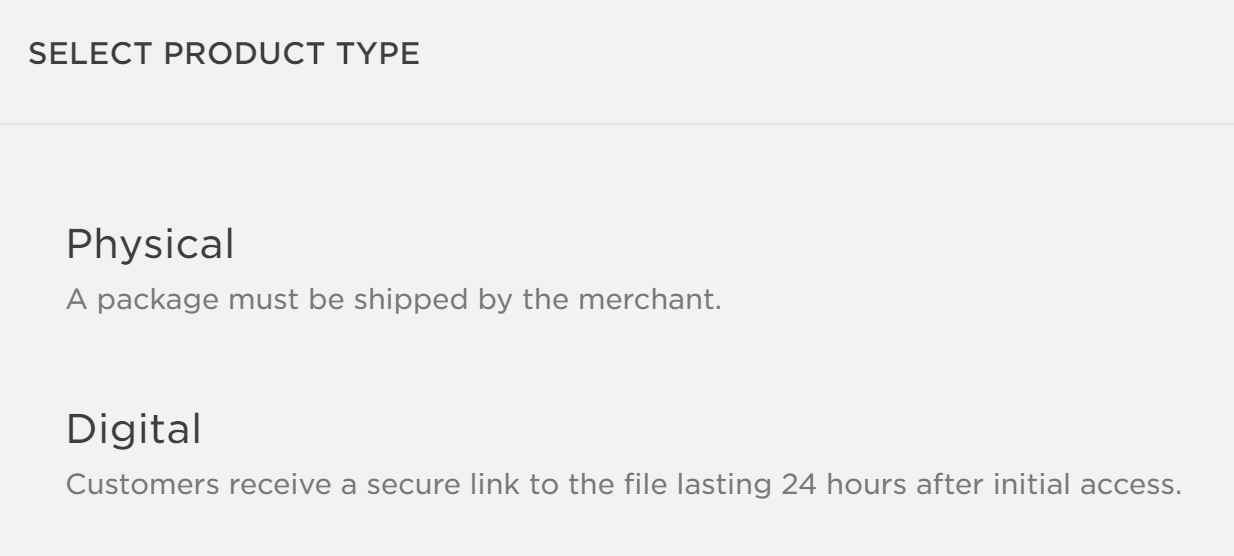
For the next step, you can choose whether you’d like to ship either prints or digital files. This is entirely up to you, based on your specific requirements:
Once you’ve made a selection, you’ll be shown a screen where you can select a name for your product, its price, a description, and a few other options:
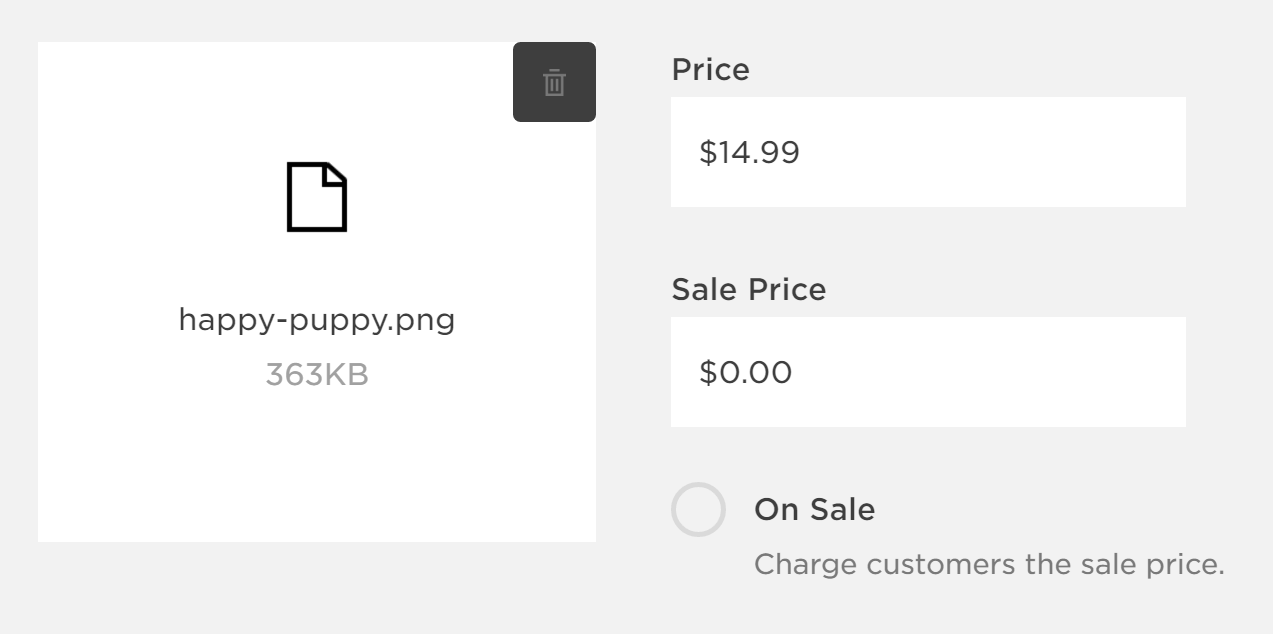
When you’re ready, click Pricing & Upload. In this screen, you can both modify your prices, and upload the file that clients will receive after purchase:
Click on Save & Publish, and you’re done! Your photograph will appear on both your inventory and Photographs page, and you’re good to go.
Overall, Squarespace is great for getting you up and running quickly. However, when it comes to advanced features that many creatives use to sell their work, it’s definitely lacking. To add them, you’ll need to consider another solution.
Visual Society: A Superior Alternative.
While Squarespace offers a good starting point for selling your photographs, its generic e-commerce focus means it’s not necessarily ideal for photographers – enter our Visual Society:
The Visual Society platform was built with photographers and artists in mind, and it enables users to sell photos and prints from their websites and keep 90% of all sales. As a result, it has many advantages over a more generic platform such as Squarespace:
- Enables you to specify multiple print sizes.
- Lets you sell membership plans to your visitors.
- Provides password-protected galleries for private showings or specific events.
- Enables you to import your images from both Lightroom and Aperture.
- Offers you the option to add photographs in bulk.
Visual Society is a fully-hosted platform, so like Squarespace, there is nothing to install and setup is a breeze. There are currently 8 theme designs to choose from that are specifically designed for photographers.
Conclusion
Squarespace is a decent option for photographers looking to get an online store up and running quickly. It offers all the features you need to get your foot in the door, but it does have its limitations. If you’re hitting the wall when it comes to selling your work on Squarespace, using Visual Society is a far more tailored solution.
In this piece, we’ve shown you how to sell your photos using Squarespace. Let’s recap the three steps quickly:
- Pick the right template.
- Configure your store’s payment options.
- Add the photographs you want to sell.
Does Squarespace offer everything you need to sell photos online, or are you intrigued by Visual Society? Share your thoughts with us in the comments section below!








Leave a Reply