
Setting up a trouble-free payment process can be nerve-wracking. It must be completely secure and fully tested before going live in order to give the customer zero problems and total confidence in their purchase. Any issues with the checkout process, and it could end up with a potential refund to the customer, or no sale at all.
Sell Media incorporates a testing mode into its settings, and with a valid PayPal Developer account (or our Stripe extension), you’ll be able to carry out the checkout process from the customer’s viewpoint, so you can ensure that everything runs smoothly from start to finish.
In this post, we’ll show you how to set up a PayPal Developer account and link it with Sell Media, before showing you how to carry out a test purchase. Finally, we’ll outline some further steps you may want to take.
Step 1: Create a PayPal Sandbox Account
Firstly, you’ll need to set up a sandbox account – this provides you with test credentials for both sellers and buyers that can be used without the fear of parting with real cash.
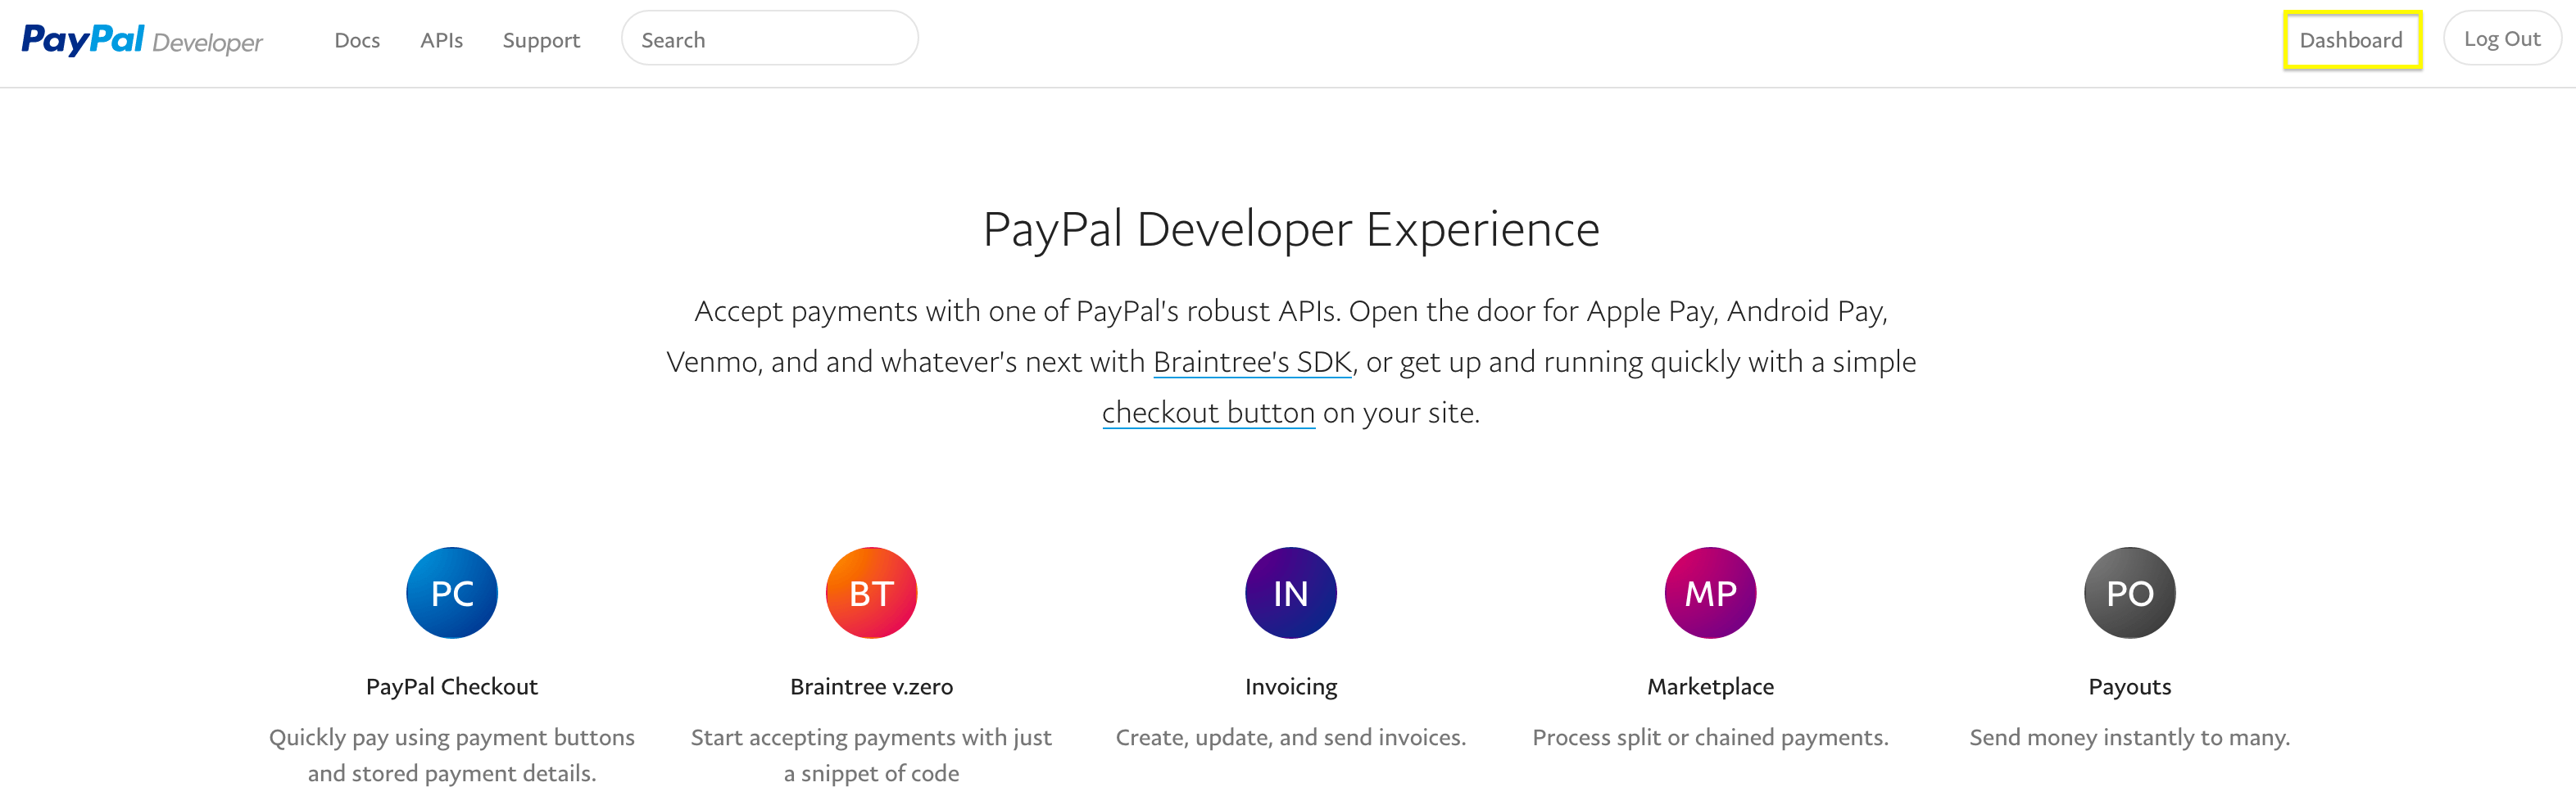
To set up a new sandbox account, log into PayPal’s Developer site with a preexisting PayPal account, then click Dashboard in the top right-hand corner…
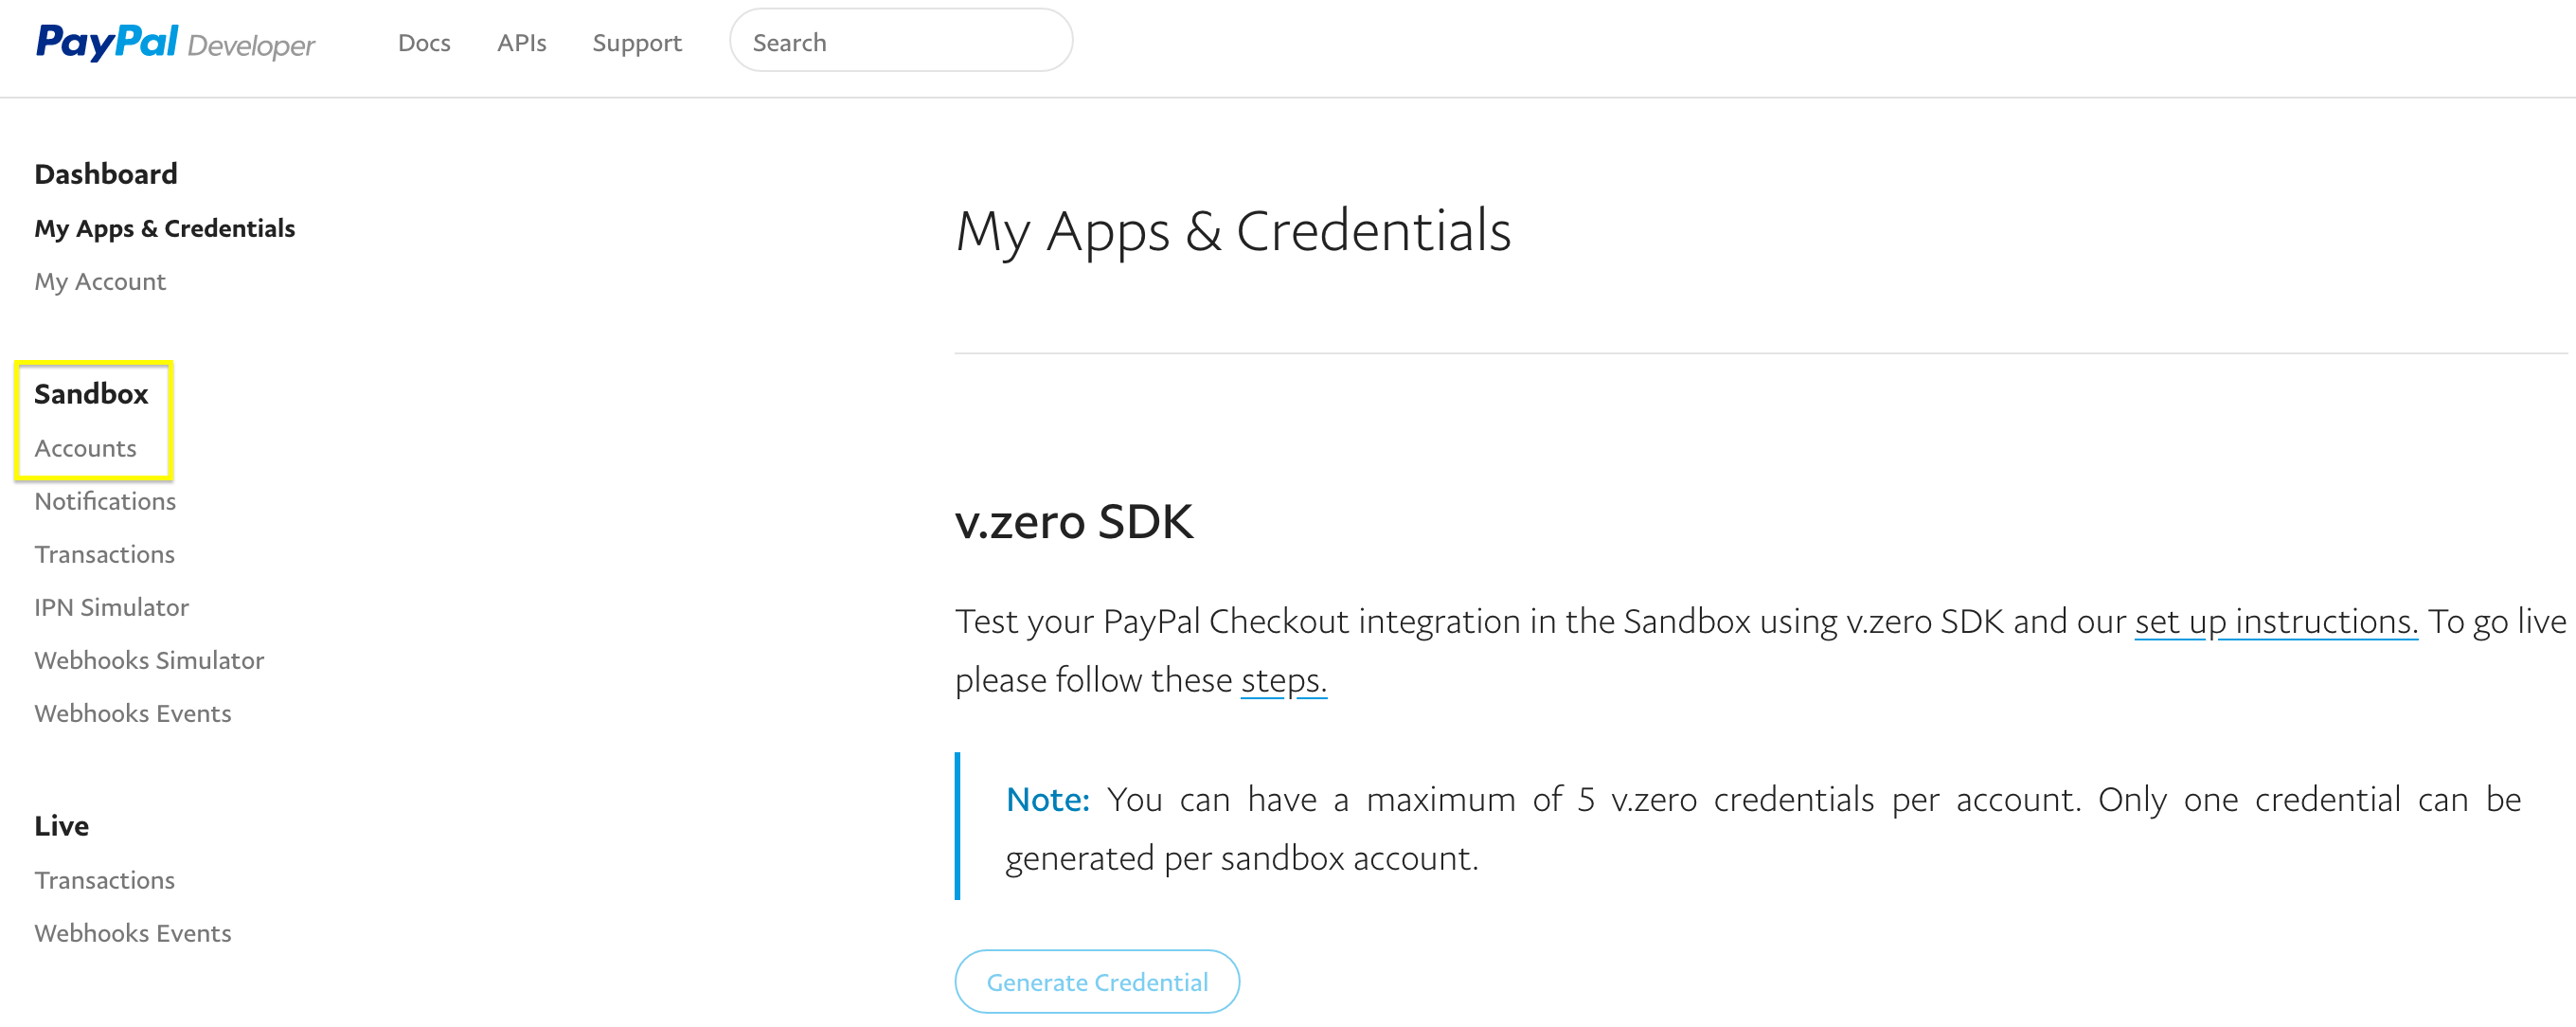
…and from the next screen, click the Accounts link under Sandbox:
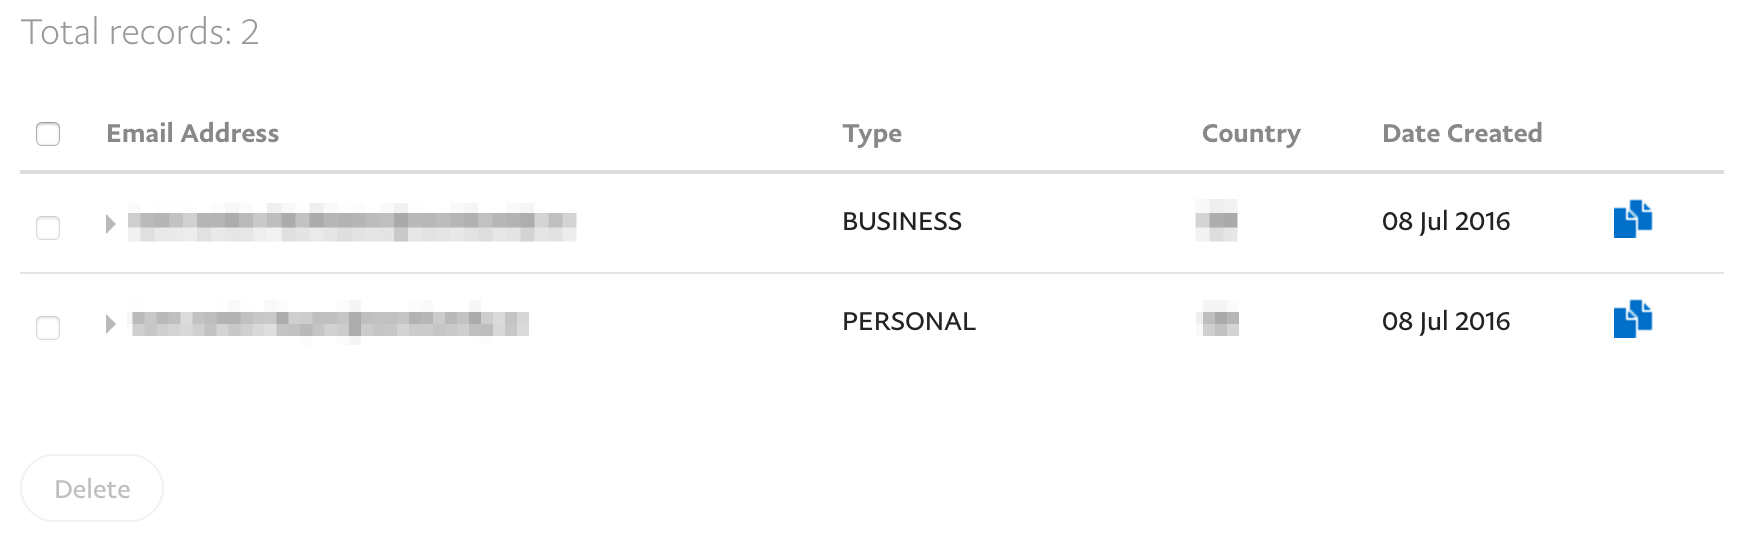
You’ll see two test accounts ready and waiting. While ours have been obfuscated, you’ll see two email address – one representing a buyer, and one for a seller (or ‘facilitator’):
At this point, your account is set up and ready to go!
Step 2: Add Your Facilitator Email to Sell Media’s Settings
We now need to add our test facilitator credentials to Sell Media. In your developer dashboard, navigate to Sandbox > Accounts, select your facilitator email address, then select Profile from the displayed links:

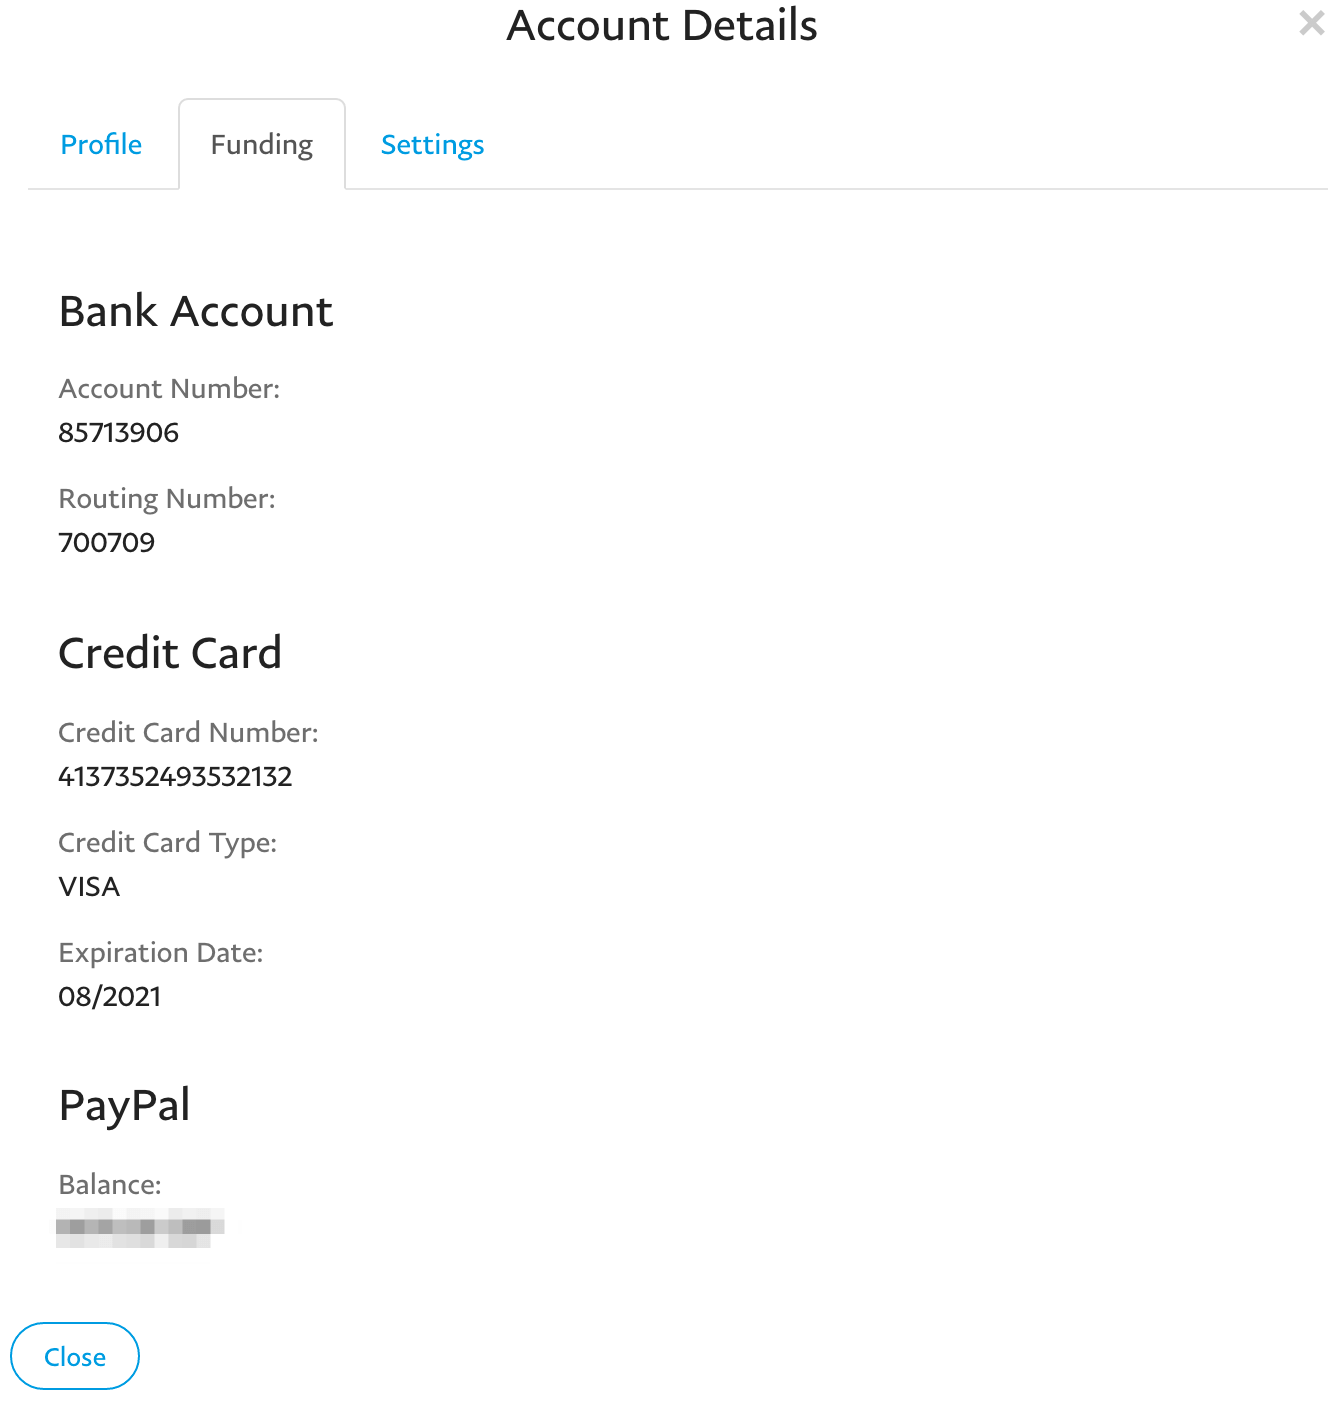
The modal box that pops up contains all of the details for your test facilitator, including bank and credit card details, and even a fake telephone number:
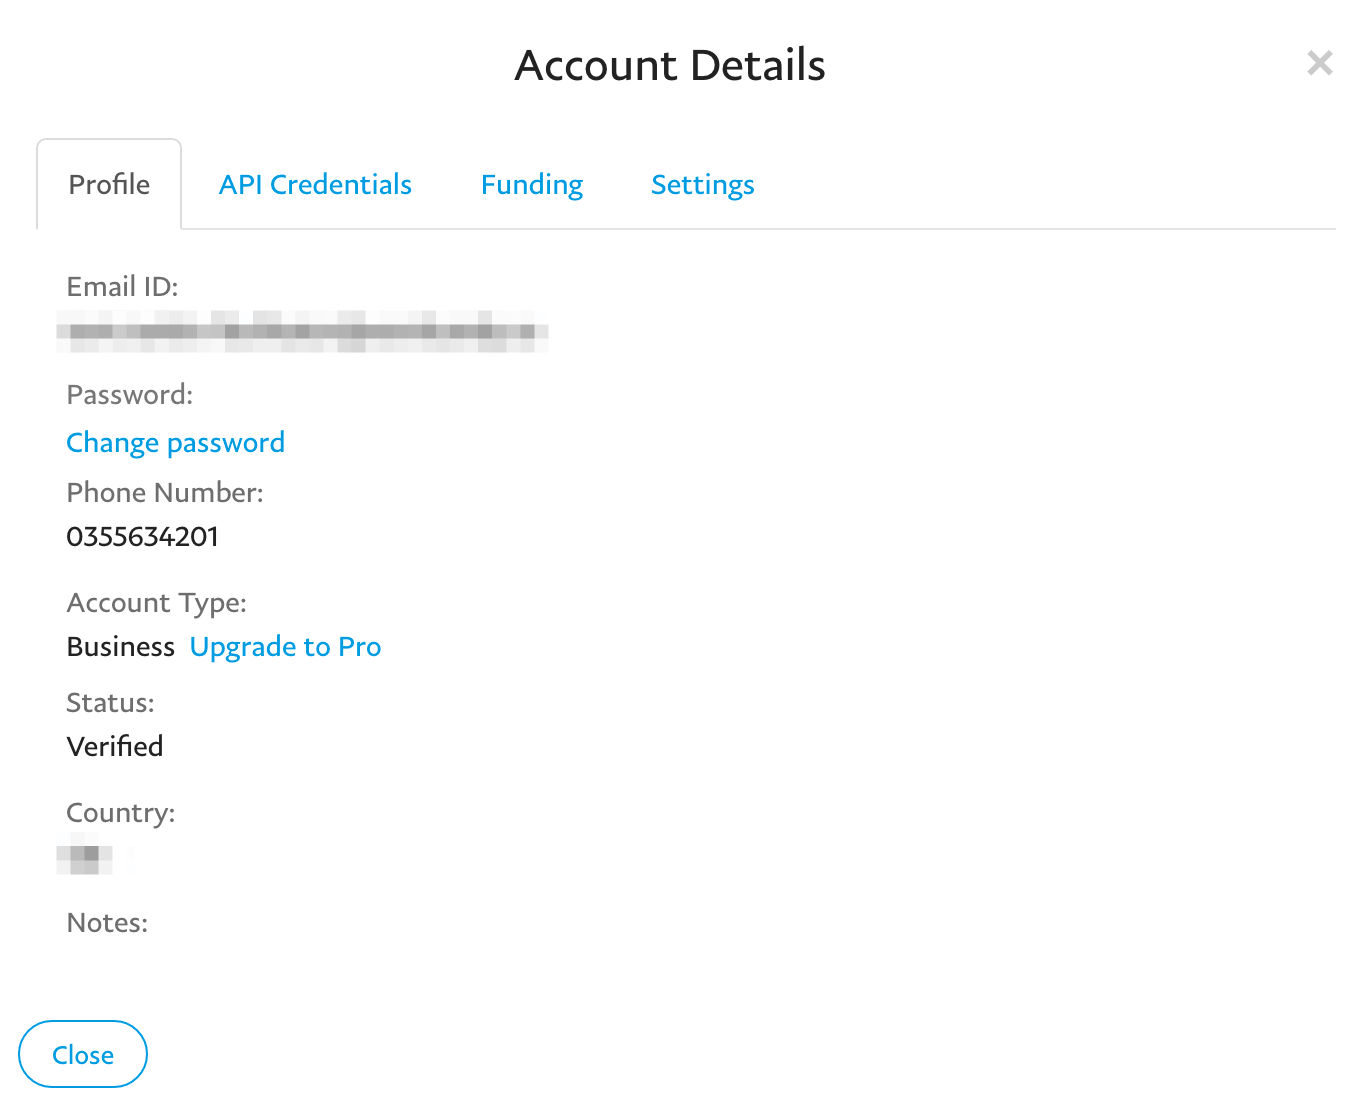
For now, copy the email address from the Email ID field, head to Sell Media > Settings in your WordPress dashboard, and click the Payment tab. Here, enter the copied email address into the PayPal Email Address field:
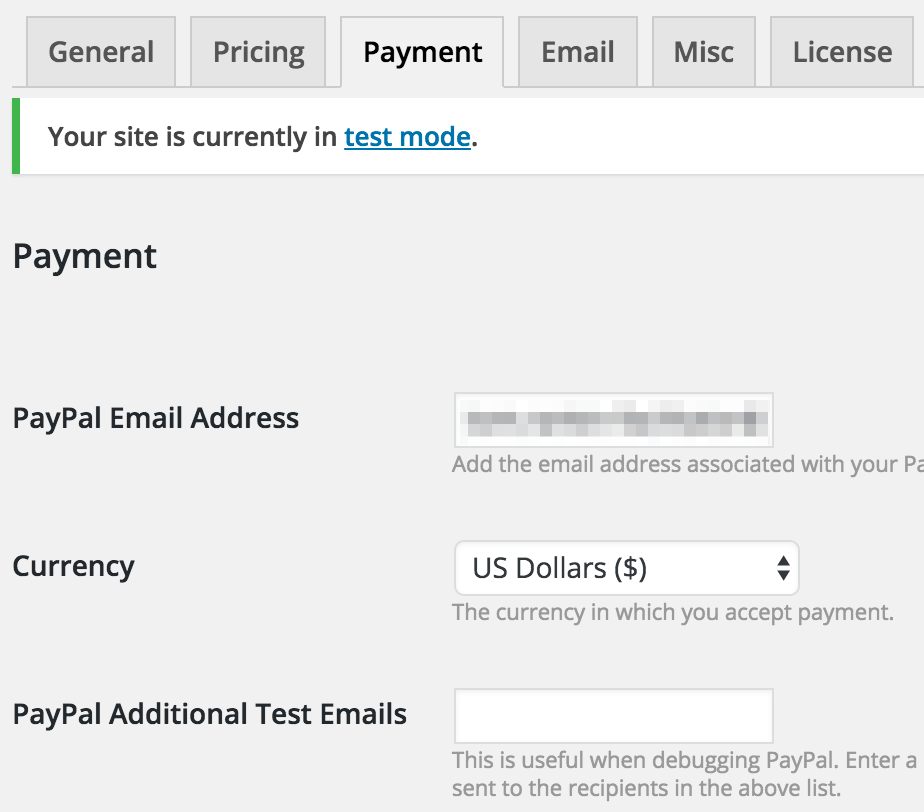
While you can view any email notifications for your test accounts from the Notifications tab within your PayPal account, you may want to see how emails look in a real world setting. If so, enter a relevant email address into the PayPal Additional Test Emails field, before clicking Save Settings at the bottom to make your changes.
Let’s now take a look at the final step – making some test purchases.
Step 3: Carry Out a Test Purchase
Now we’ll use our test buyer account to make a purchase, looking for any bugs or quirks in the process that we can iron out later.
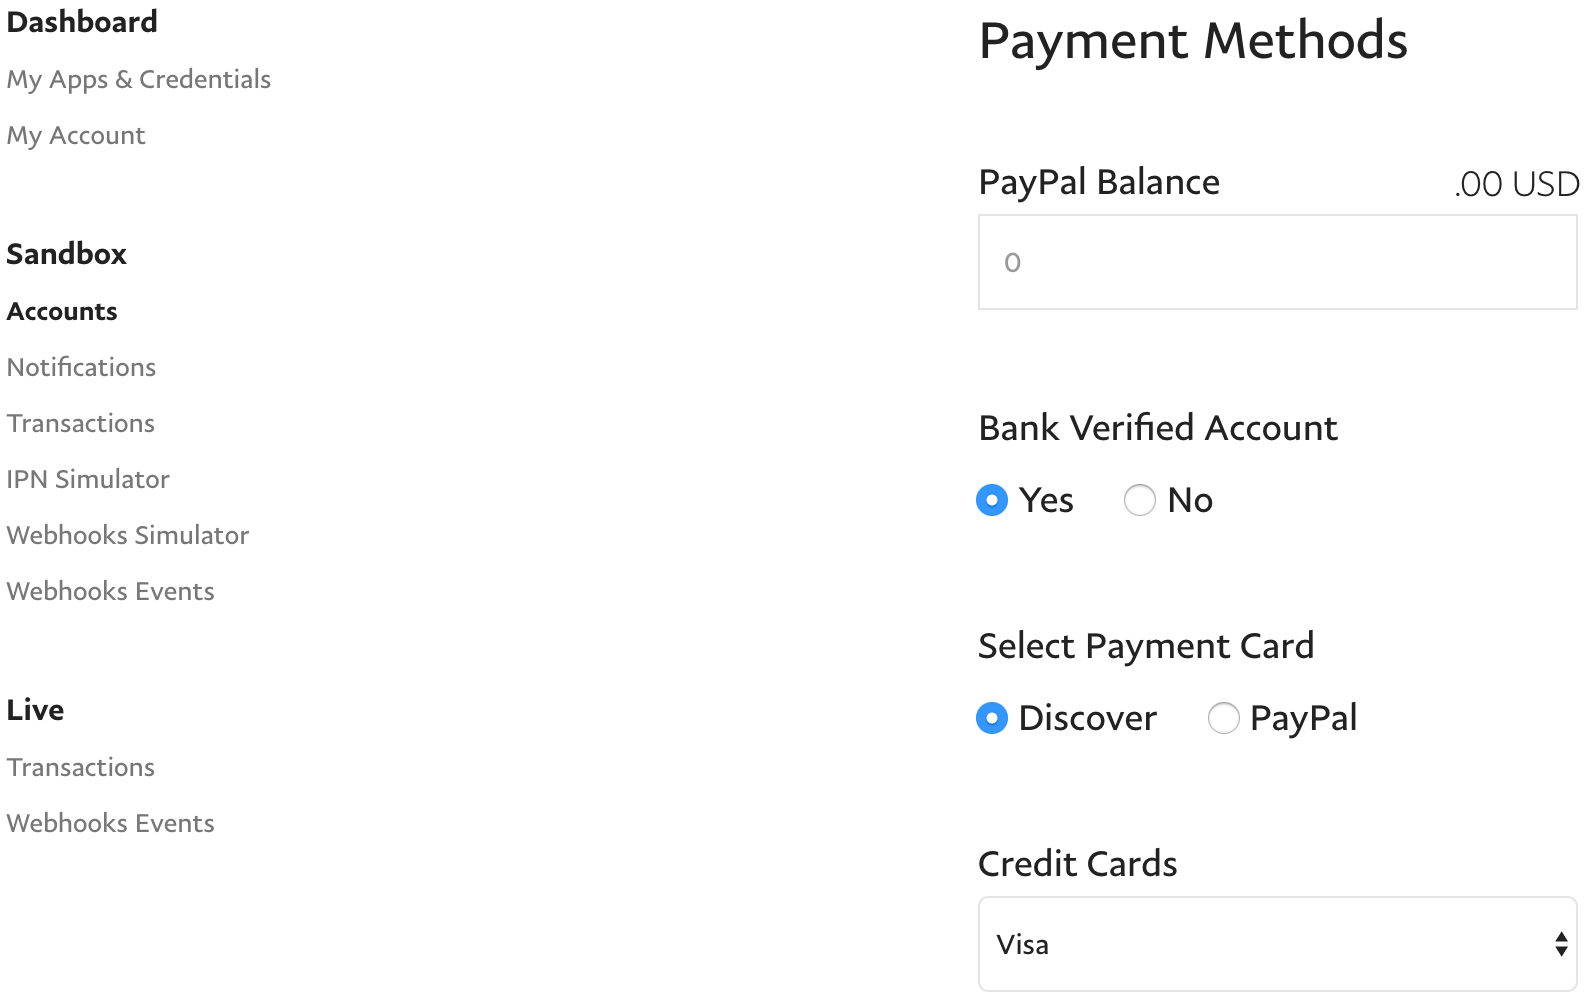
Firstly, head back to the Accounts page in your PayPal developer account, and as with the facilitator email, select the Profile link. Similarly to the facilitator account, your buyer profile is populated with test credentials. You’ll need to note down the email address within the Profile tab, and the bank and credit card details from the Funding tab:
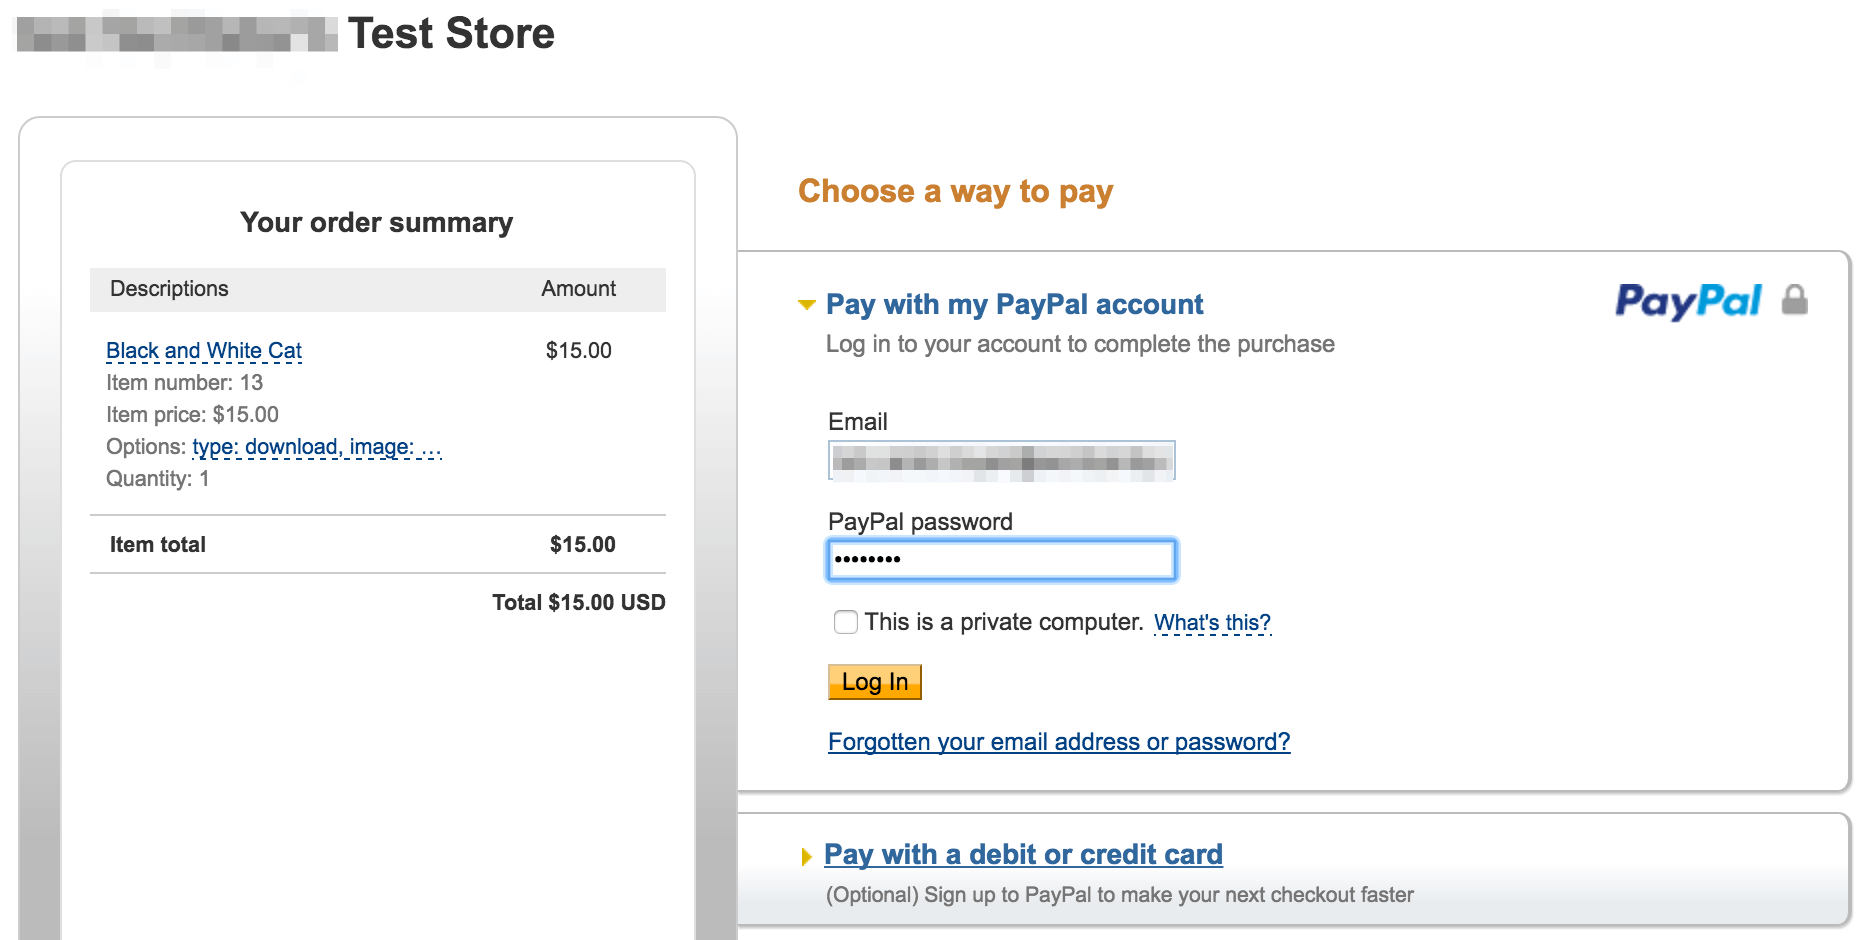
Next, go to your website’s store and complete the checkout process. Once you click the Checkout Now button, you’ll be taken to the familiar PayPal login page. Here, check your order summary on the left hand side, enter your buyer email address and password into the relevant fields, and click Log In:
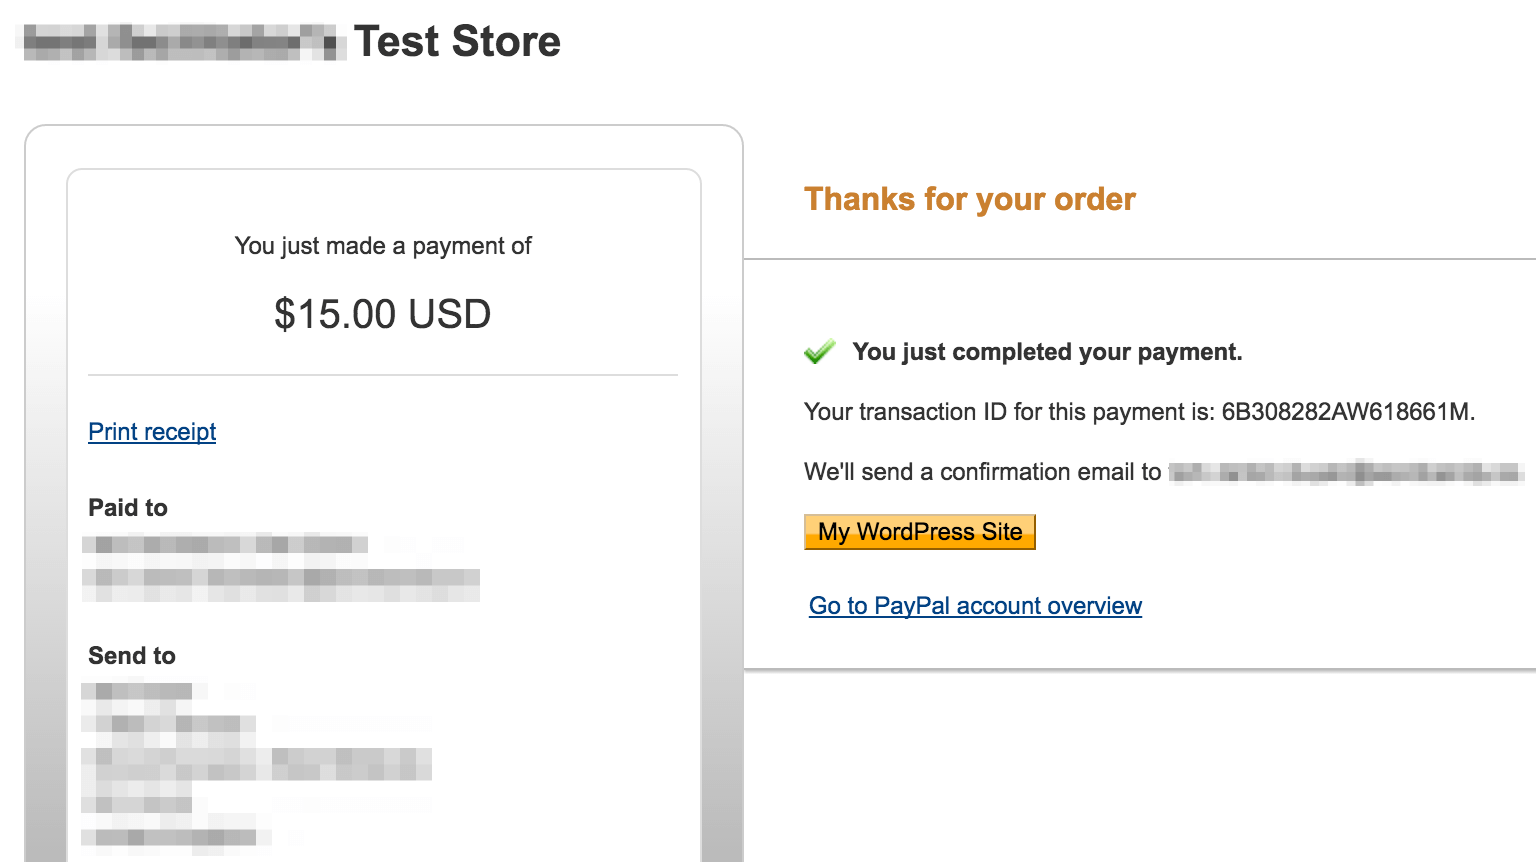
On the next screen, check the delivery address and balance, before clicking Pay Now – you should a screen confirming the transaction:
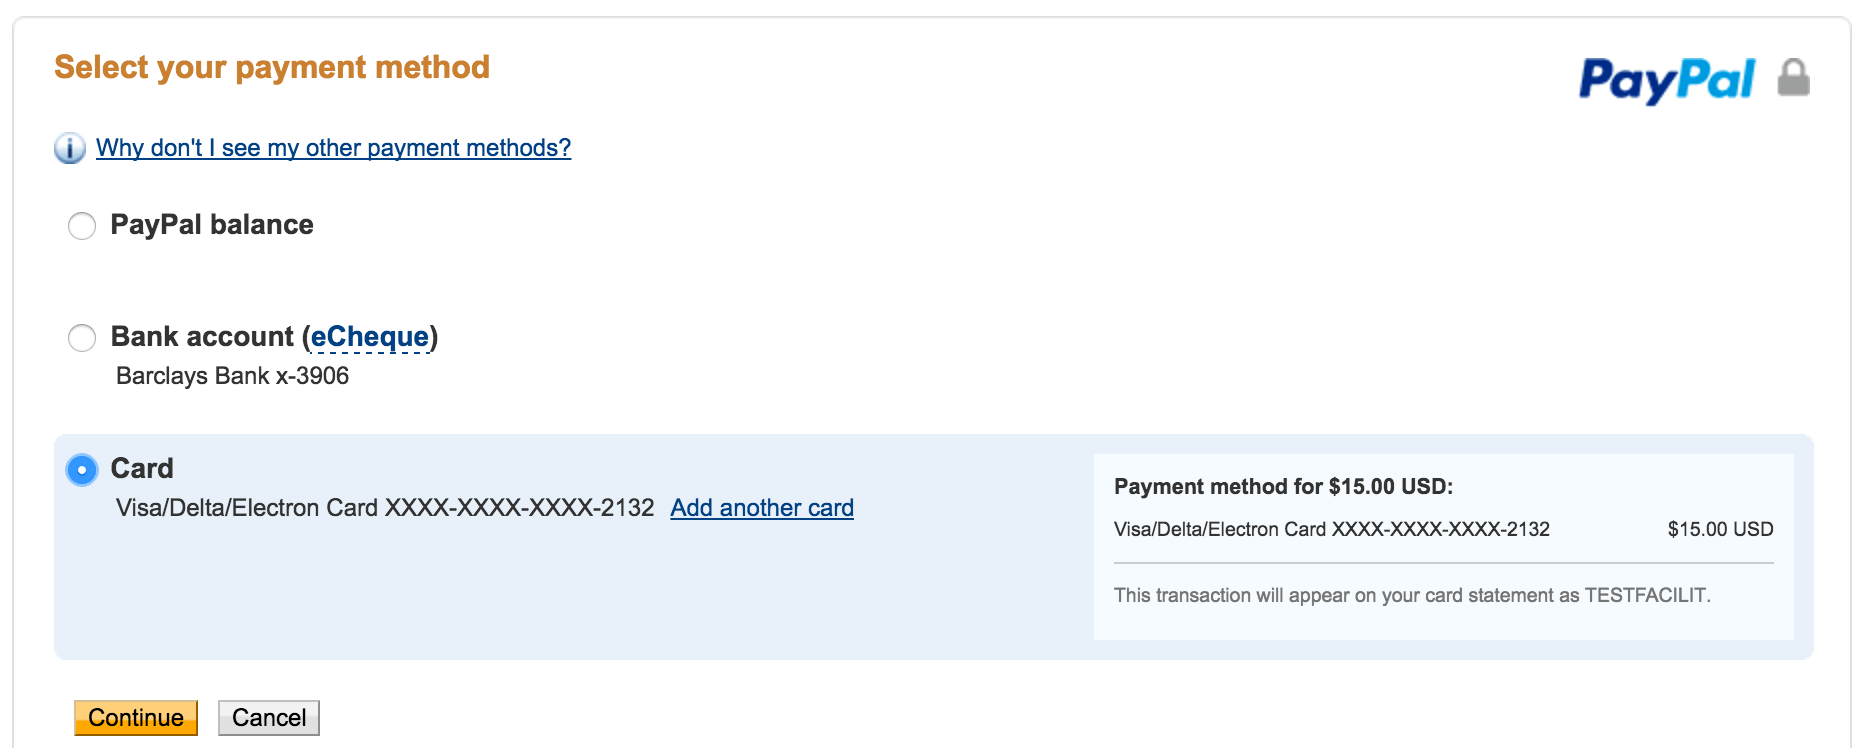
To test out other purchasing methods, go back through the checkout process again, but this time click Change under the Payment methods section on the Review your information screen:
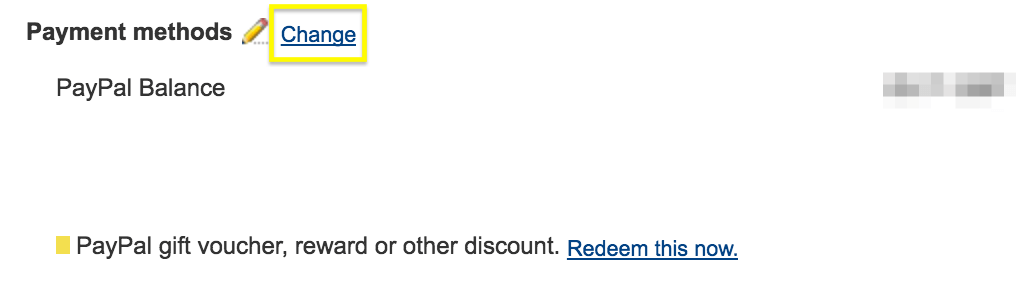
From here, you can select to pay via eCheque or credit card using the credentials noted earlier:
What You Should Do Next
At this point, you’ve successfully carried out a test purchase – but only from the viewpoint of one buyer. By navigating to the Accounts page on your PayPal developer dashboard and clicking Create Account, you can create buyers of all types, such as those with no funds, or an unverified account:
This is vital for gauging how your checkout process differs for various customers, so it’s worth taking the time to set up and test different types of buyers.
Finally, although this post is specific to PayPal, you may want to add another payment gateway. With our Sell Media Stripe extension, you can also add this popular payment method to your website – however, you will need to set up separate testing accounts with Stripe themselves rather than PayPal.
Conclusion
Not knowing the process a user goes through in order to buy your product – especially when it’s from your own website – is inexcusable. If a problem arises, your lack of knowledge could hit you where it hurts: your pocket.
In this post, we’ve outlined the steps you’ll need to take in order to make test purchases on your Sell Media powered website using PayPal. Let’s recap:
- Create a PayPal developer account.
- Add your facilitator email to Sell Media’s settings.
- Carry out test purchases using the Buyer credentials found within your PayPal account.
- Set up further buyers, based on the potential customers you’ll receive.
Do you have any questions about setting up test purchases using PayPal within Sell Media? Ask away in the comments section below!
Image credit: skeeze.
Leave a Reply