This tutorial will help you install and use your Graph Paper Press theme.
Please Note: You must have WordPress installed on your own self-hosted site to use our themes. If your site is hosted by WordPress.com, you will not be able to install your own themes or plugins.
Installing Your Theme
- Download the zip file from your members dashboard. This will always be the most current version of the theme.
- Log in to your WordPress dashboard. This can be found at yourdomain.com/wp-admin
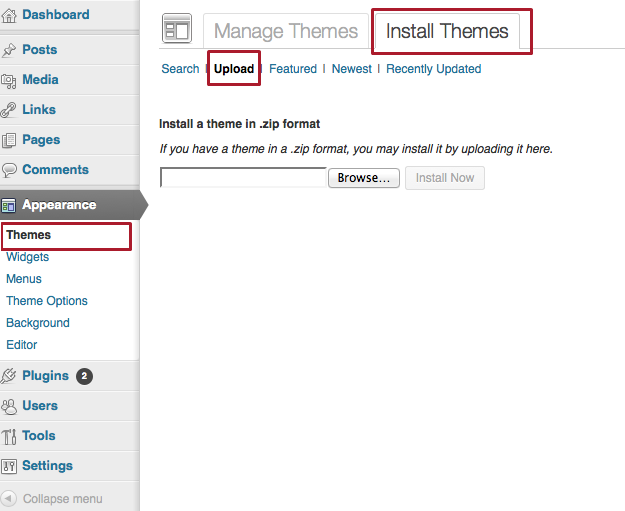
- Go to Appearance > Themes and click on the Install Themes tab
- Click on the Upload link
- Upload the zip file that you downloaded from your members dashboard and click Install Now
- Click Activate to use the theme you just installed.
You can also install your theme via FTP, read Installing Your Theme for more details.
Theme Options
Many of our themes come with a Theme Options panel, which can be accessed at Appearance > Theme Options.
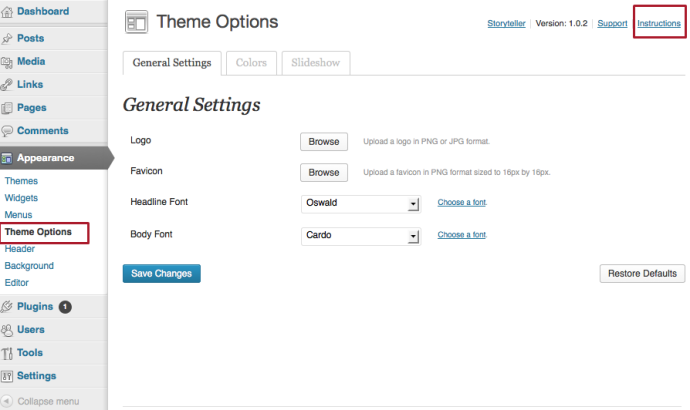
From this panel, you can add your own settings, for example uploading a logo and favicon, changing your font, adding custom colors and styles, and activating elements such as slideshows and widget areas. You can also view the theme’s instructions, which will give you more detailed information for using that theme.
Custom CSS Panel
Your theme options panel includes a text box to allow you to enter custom CSS. CSS (Cascading StyleSheets) is the styles on your site—colors, fonts, layout, etc. You can add new styles to this box to change the design of your site. Styles added here will not be deleted when you update your theme.
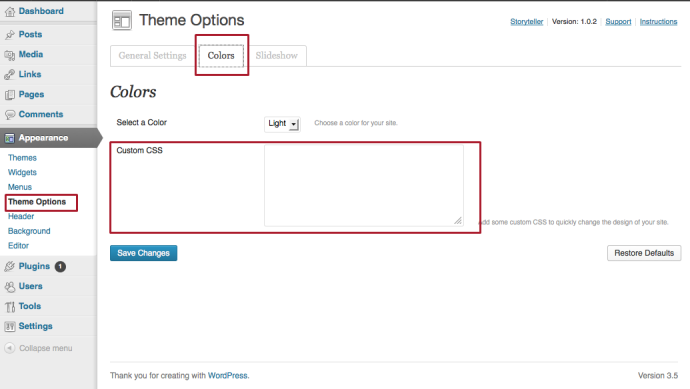
Do not enter any code other than CSS in this box or it will break your styles. For more detail about writing your own styles, read our Customization 101 tutorials.
Adding Posts
Posts are dynamic content added to your blog that can be tagged and categorized and displayed in your feeds and archive pages. To add a new post to your site:
- Log in to your WordPress dashboard.
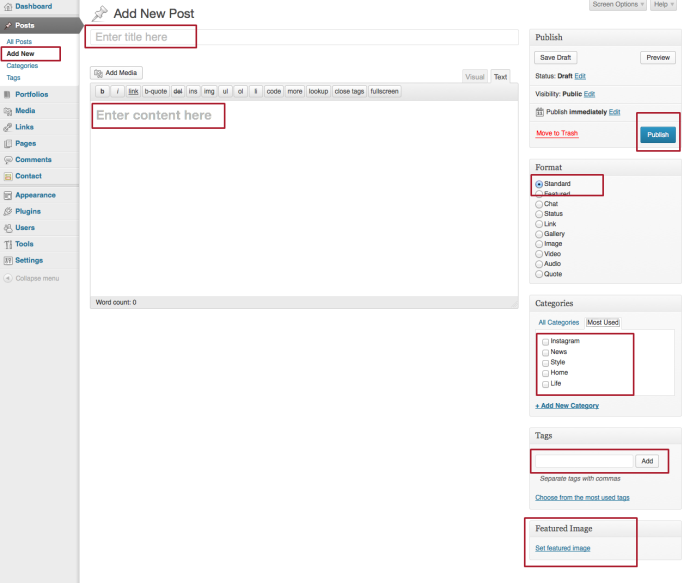
- Go to Posts > Add New.
- Add a title in the Title entry box.
- Add your post’s content in the Content box.
- Assign categories and tags to your post.
- If available, choose a post format for your post.
- Add a featured image.
- When you are ready, click Publish.
For more information about adding a new post, read Creating a New Post.
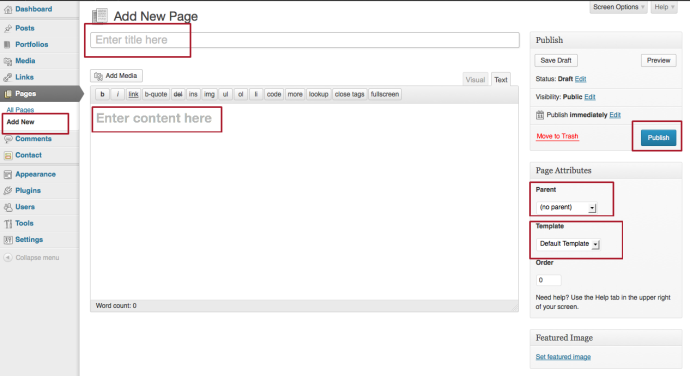
Adding Pages
Pages are static content on your site that cannot be tagged, categorized or added to feeds or archive pages. To add a new page:
- Log in to your WordPress dashboard.
- Go to Pages > Add New.
- Add a title in the Title entry box.
- Add your post’s content in the Content box.
- Choose a page template if there is one available.
- Choose a parent page for that new page, if desired.
- When you are ready, click Publish.
For more information about adding or editing a page, read Creating and Editing Pages.
Adding a Featured Image
Many of our themes use the Featured Image to generate thumbnails on the home page and archive page. You can set the featured image from your Post edit page:

Choose the image you want to set as the default thumbnail for this post and click the Set as Featured Image button. Please ensure that this image is larger than the set size of the thumbnail for your chosen theme or your image will be stretched and distorted. You can view the set thumbnail size in Settings > Media.
Adding a Custom Menu
Our themes use WordPress’s custom menus option. These can be created in Appearance > Menus. To add a new menu to your site:
- Go to Appearance > Menus.
- Create a new menu item by clicking the + tab.
- Select the pages you want to display in your menu and click the Add to Menu button. If you do not see the type of page (category, tag, portfolio, gallery, etc) you want to display, click the Screen Options link at the top of the page and make sure the page type is checked.
- Once you have set your menu as you want it, click the Save Menu button.
- Then, assign that menu to your desired theme location to ensure your menu appears where you want it and click Save.

For more detail about creating your menu, please read Building Custom Menus.
Adding Widgets
If your chosen theme comes with widget areas, you can add content to these in Appearance > Widgets.
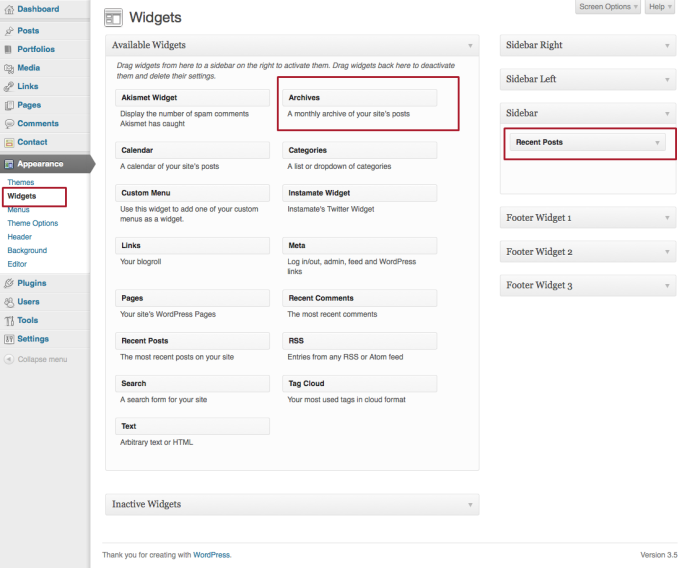
You can add content such as a list of your archives or categories, your latest posts or latest comments, text, images, etc. Simply drag your desired widget to the correct widget area and it will appear on your site. The widget may open for you to provide extra information, such as title, or options.
If you are using one of our one-column themes, the sidebar can be activated by adding content to the Sidebar widget area.
For more detail about adding widgets to your site, please read Adding Widgets.