


Squarespace is a useful platform for many users. It’s easy to use, possesses some excellent features, and looks modern to boot. That being said, there’s no need to limit yourself to using a single platform in order to harness various aspects of its functionality.
If you don’t mind a little work, it’s entirely possible to integrate Squarespace with a second platform such as WordPress. This enables you to tap into its powerful feature set – and plugins such as Sell Media.
In this article, we’ll teach you exactly how to integrate Squarespace with WordPress in just five steps – and we’ll assume you already have a Squarespace website, as well as a domain that’s been mapped to the platform.
Step #1: Purchase WordPress Hosting
This first step is the most crucial one, as without a suitable host you can’t run WordPress. Hosting is a subject that has been covered extensively over the years, so there are plenty of resources available to make your decision. Simply put, the key to finding the perfect WordPress host is to know your budget, look for good reviews, and find an option that includes the features you’ll need.
If – after doing some research – you’re still unsure of which way to lean, check out our recommended Web hosts:


They’re a reliable option with a wide array of WordPress-specific features, so you’ll be in good hands.
As for how to purchase hosting, the process couldn’t be simpler. In fact, it’s pretty much the same as any other online purchase. Just break out the old credit card (or PayPal) and go with the plan that suits your needs the best.
Step #2: Create a Subdomain for Running WordPress
Subdomains enable you to create entirely new websites without needing to register a new domain. You could, for example, own the mysquarespacewebsite.com domain, and set up a wordpress.mysquarespacewebsite.com subdomain to install WordPress on it. It enables your website to stay as it is, while running a separate (yet related) site elsewhere. However, to run two websites off of one domain, you may need to consult your host for guidance.
The actual process of creating a subdomain will vary depending on your web host or registrar, but it’s mostly the same across all platforms. To begin, log in to your web host dashboard and find your cPanel. Inside, look for the Subdomain option:
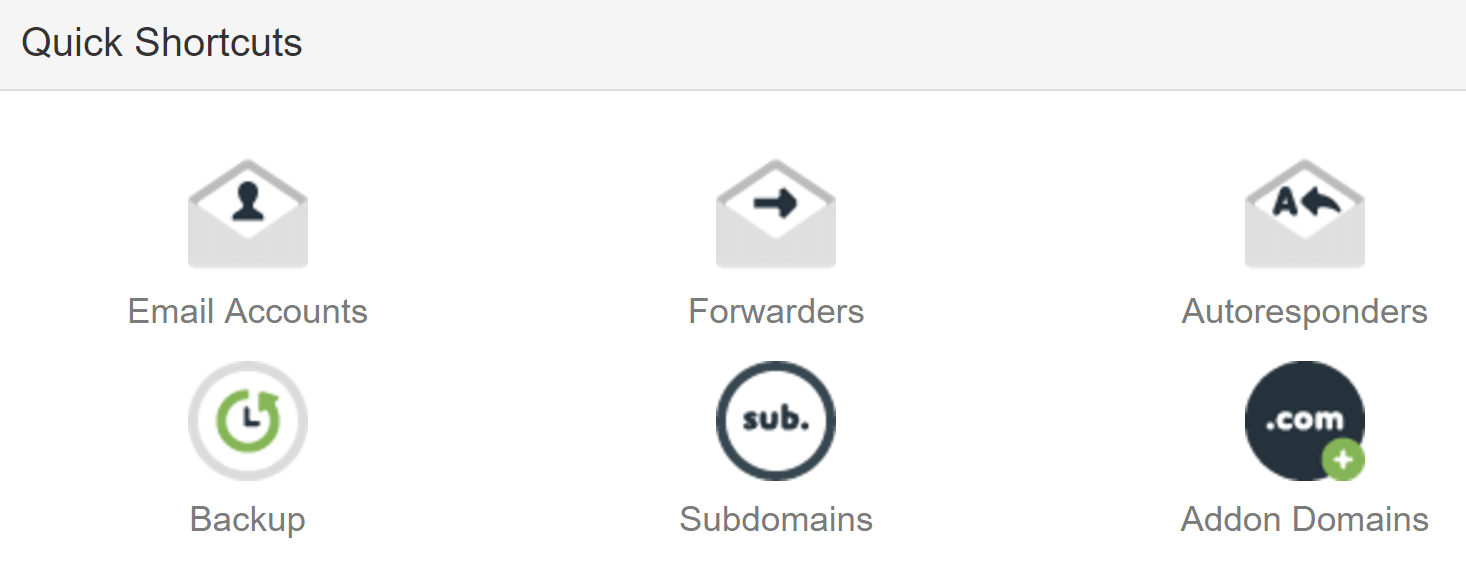

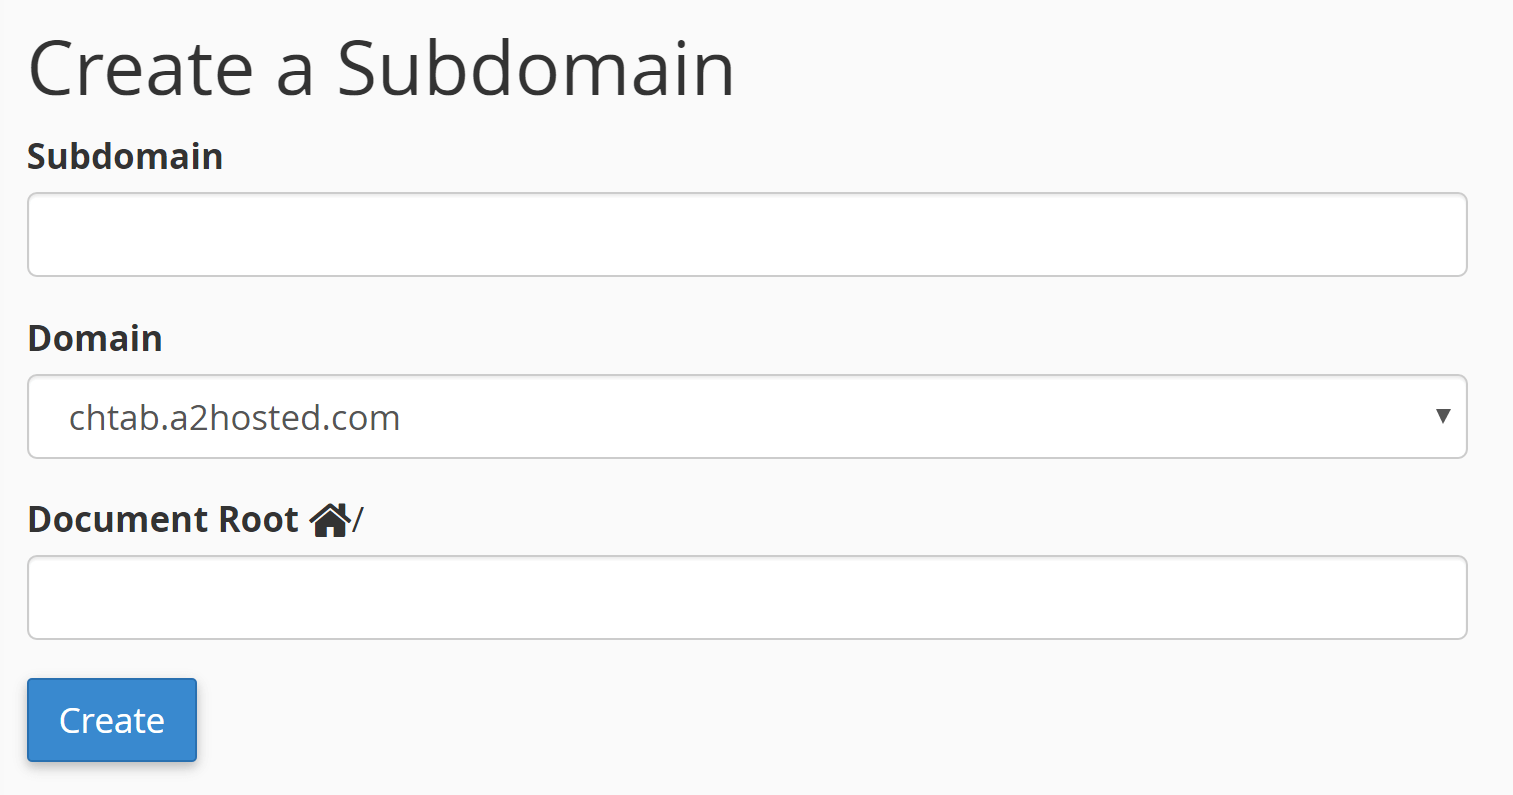
Click on it, then choose a name for your subdomain on the next screen (such as blog, shop, or store. Essentially, something that accurately describes your site’s purpose). Select your ‘parent’ domain from the drop-down, then click Create:

After confirming your choice, your subdomain will be up and running! Now it’s time to install WordPress.
Step #3: Install WordPress on Your Subdomain
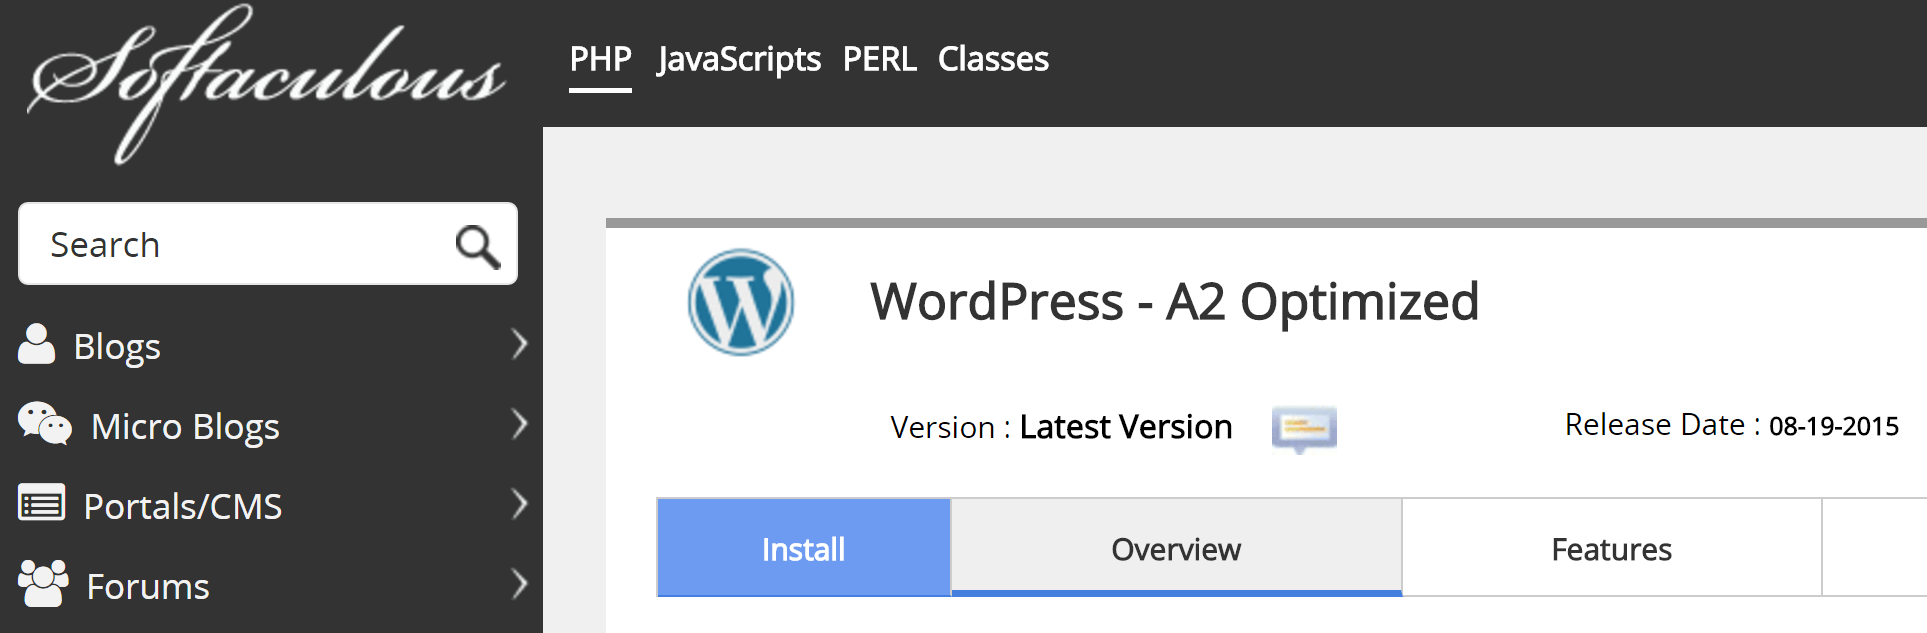
The process of installing WordPress varies a bit across web hosts, but most of them make it quite easy by providing you with a ‘one-click’ option. These are often located under your cPanel – in this example, we’re using the Softaculous application installer:

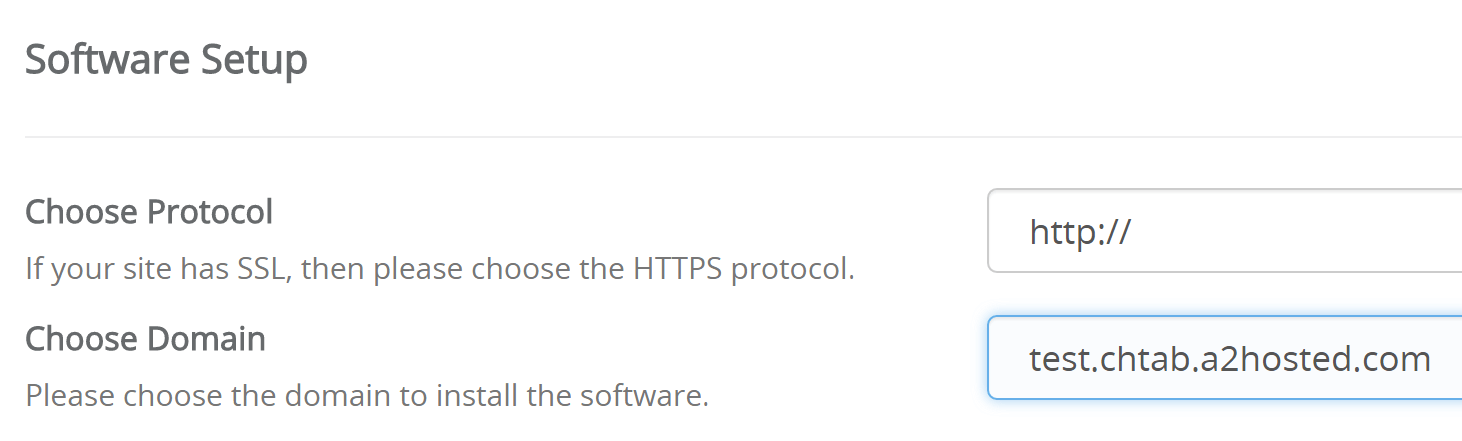
You’ll be looking for an option similar to Install WordPress, and when you’ve found it, click on Install Now. Next, fill all the necessary fields such as your site name, admin username, and email address. Pay particular attention to the Choose Domain option – it’s here that you’ll select your subdomain URL:

When you’ve filled every field, click on Install at the bottom of the page, and sit back while the magic happens. Once it’s complete, you’ll want to customize your new WordPress site.
Step #4: Customize Your WordPress Installation
There are a myriad of options for customizing your new WordPress website including picking out fonts and choosing a color scheme. However, since we want to integrate our new installation with Squarespace, you’ll want to make both look as similar as possible.
Much like Squarespace, WordPress also enables you to use themes to tailor the look of your website. They’re easy to install, and while there are thousands of free themes available, you’ll get more mileage from a well-designed premium option. For our purposes, we simply need to find two similar-looking themes, and minimize the differences using the in-built options.
For example, take a look at the Avenue template on Squarespace:


One of our themes – QUA – matches Avenue’s design quite well as they both feature minimalistic, modern styles:


Once you’ve chosen and customized your theme, you’ll want to enhance your WordPress site’s functionality using add-ons called ‘plugins’. Much like themes, many plugins are free, and some are absolutely essential for a secure and safe installation. One example that can help you sell your photography is our Sell Media plugin:


This enables you to sell your photography directly from your website, without skimming off a percentage of your profits. You can choose which work you sell, how it looks, whether you sell physical prints, and much more. In addition, you can also extend it’s functionality to cover all manner of additional features.
Once you have WordPress set up, the final step is to integrate both of your websites.
Step #5: Connect Your Squarespace and WordPress Sites
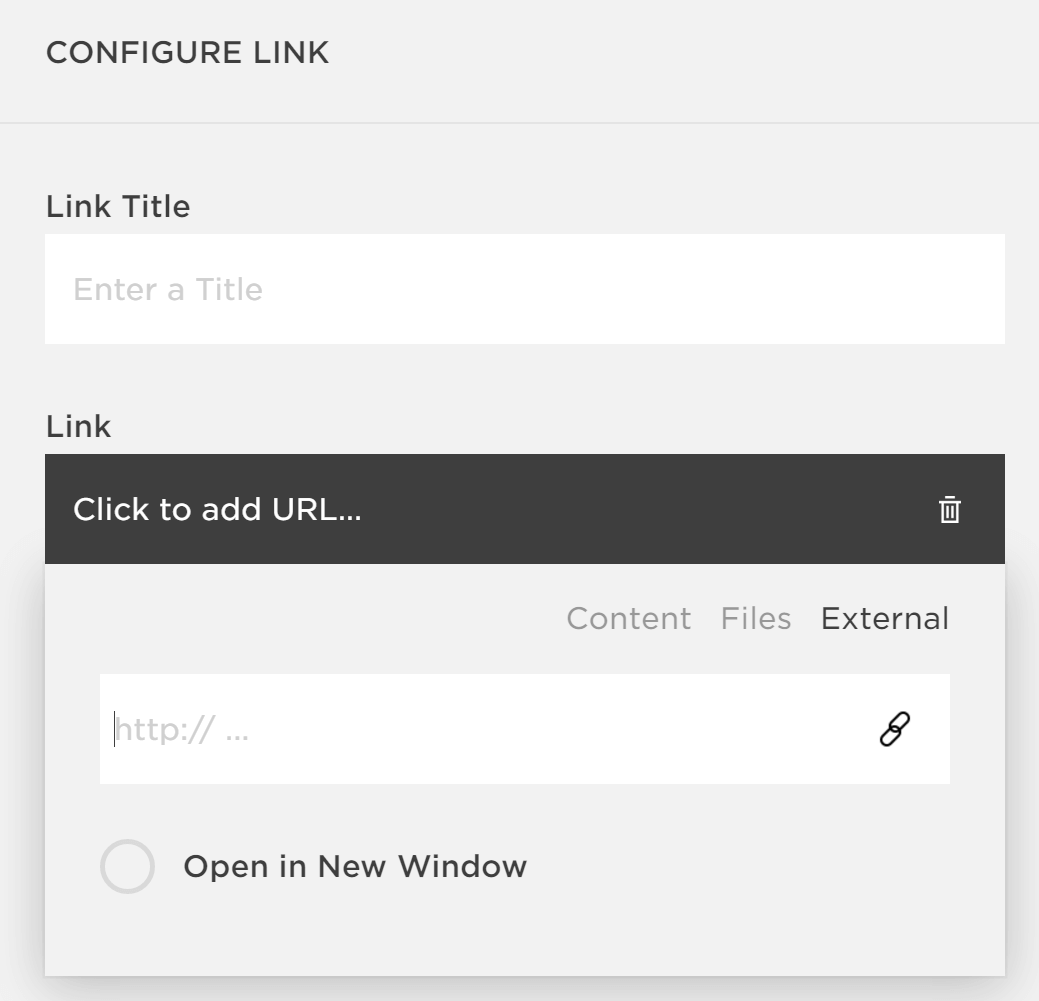
Let’s begin with Squarespace. Log in, navigate to the Pages section on your dashboard, and click Top Navigation. From here, choose the Link option:
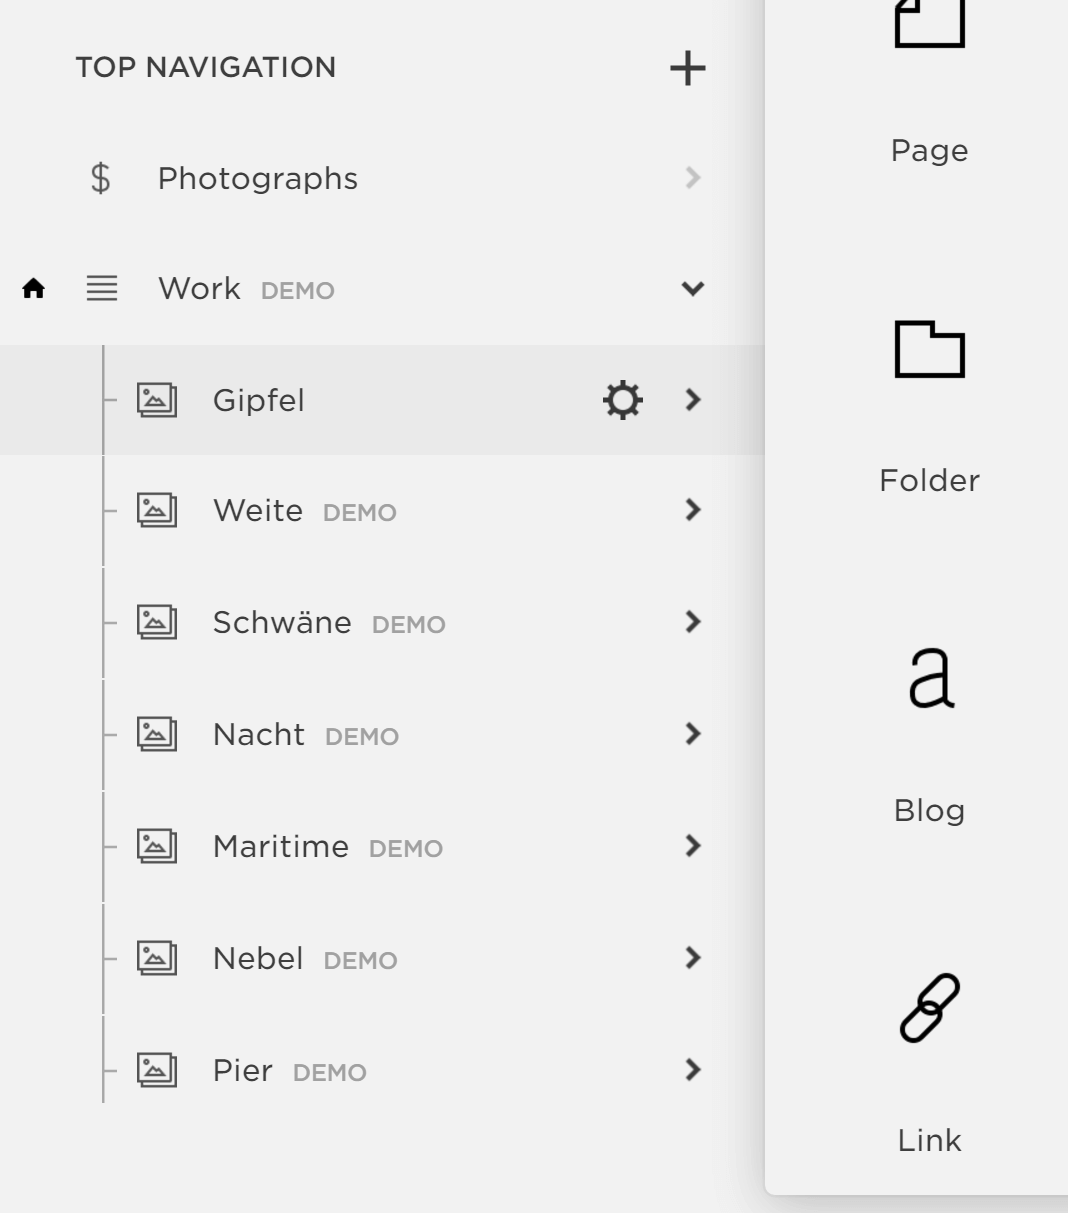

Pick a title and add a link to the WordPress page of your choosing. Click on Save, and repeat the process for as many pages as you want to link together:

Now we need to make sure that our WordPress navigation bar includes the same links as our Squarespace site. That way, visitors will be able to jump between both without knowing they’re two separate platforms. To do so, navigate to Appearance > Menus on your WordPress dashboard.
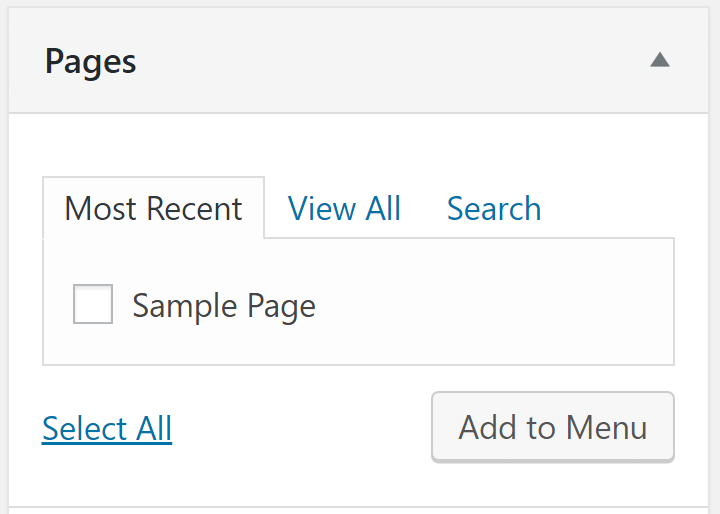
If creating a menu in WordPress looks complicated, don’t worry – it’s simple to do. Once you’ve set one up, take a look at the Pages meta box on the left hand side of the screen. The default option enables us to add any pages we’ve created in WordPress so far, so select them and click Add to Menu. You may also want to modify their Navigation Labels to match those on your Squarespace navigation bar if necessary:

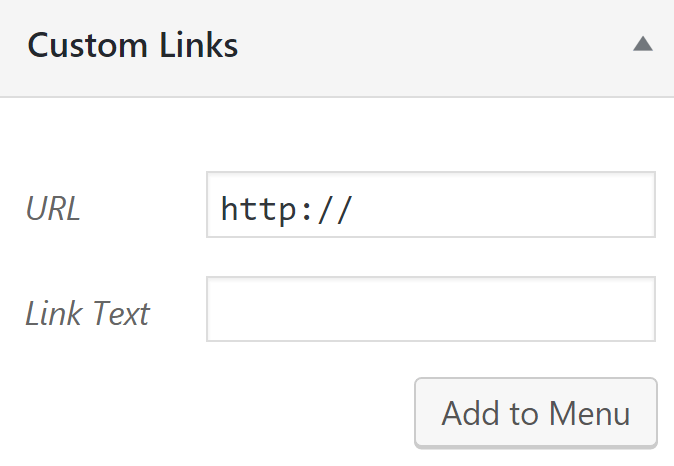
To add your Squarespace pages to your WordPress menu, choose the Custom Links option, type the name of its corresponding pages, their URLs, then click Add to Menu again:

Finally, remember to make sure the order of your WordPress navigation menu matches that of Squarespace. WordPress enables you to drag-and-drop your items, so your menu can match your Squarespace site in a flash.
Conclusion
Integrating Squarespace with WordPress might not be the most straightforward solution, but it’s a good option for those who want to use WordPress’ powerful functionality. To get the most out of this pairing, you’ll want to set up your home page using Squarespace, and leave WordPress to do the heavy lifting if you need advanced functionality on other pages.
Let’s recap the five steps you’ll need to follow:
- Find a good WordPress host.
- Create a subdomain.
- Install WordPress.
- Find matching (or similar) Squarespace and WordPress themes, and install plugins such as Sell Media.
- Connect your Squarespace and WordPress sites.
What Squarespace features would you like to see in WordPress, or vice-versa? Share your thoughts with us in the comments section below!
Image credit: Pixabay.